merp
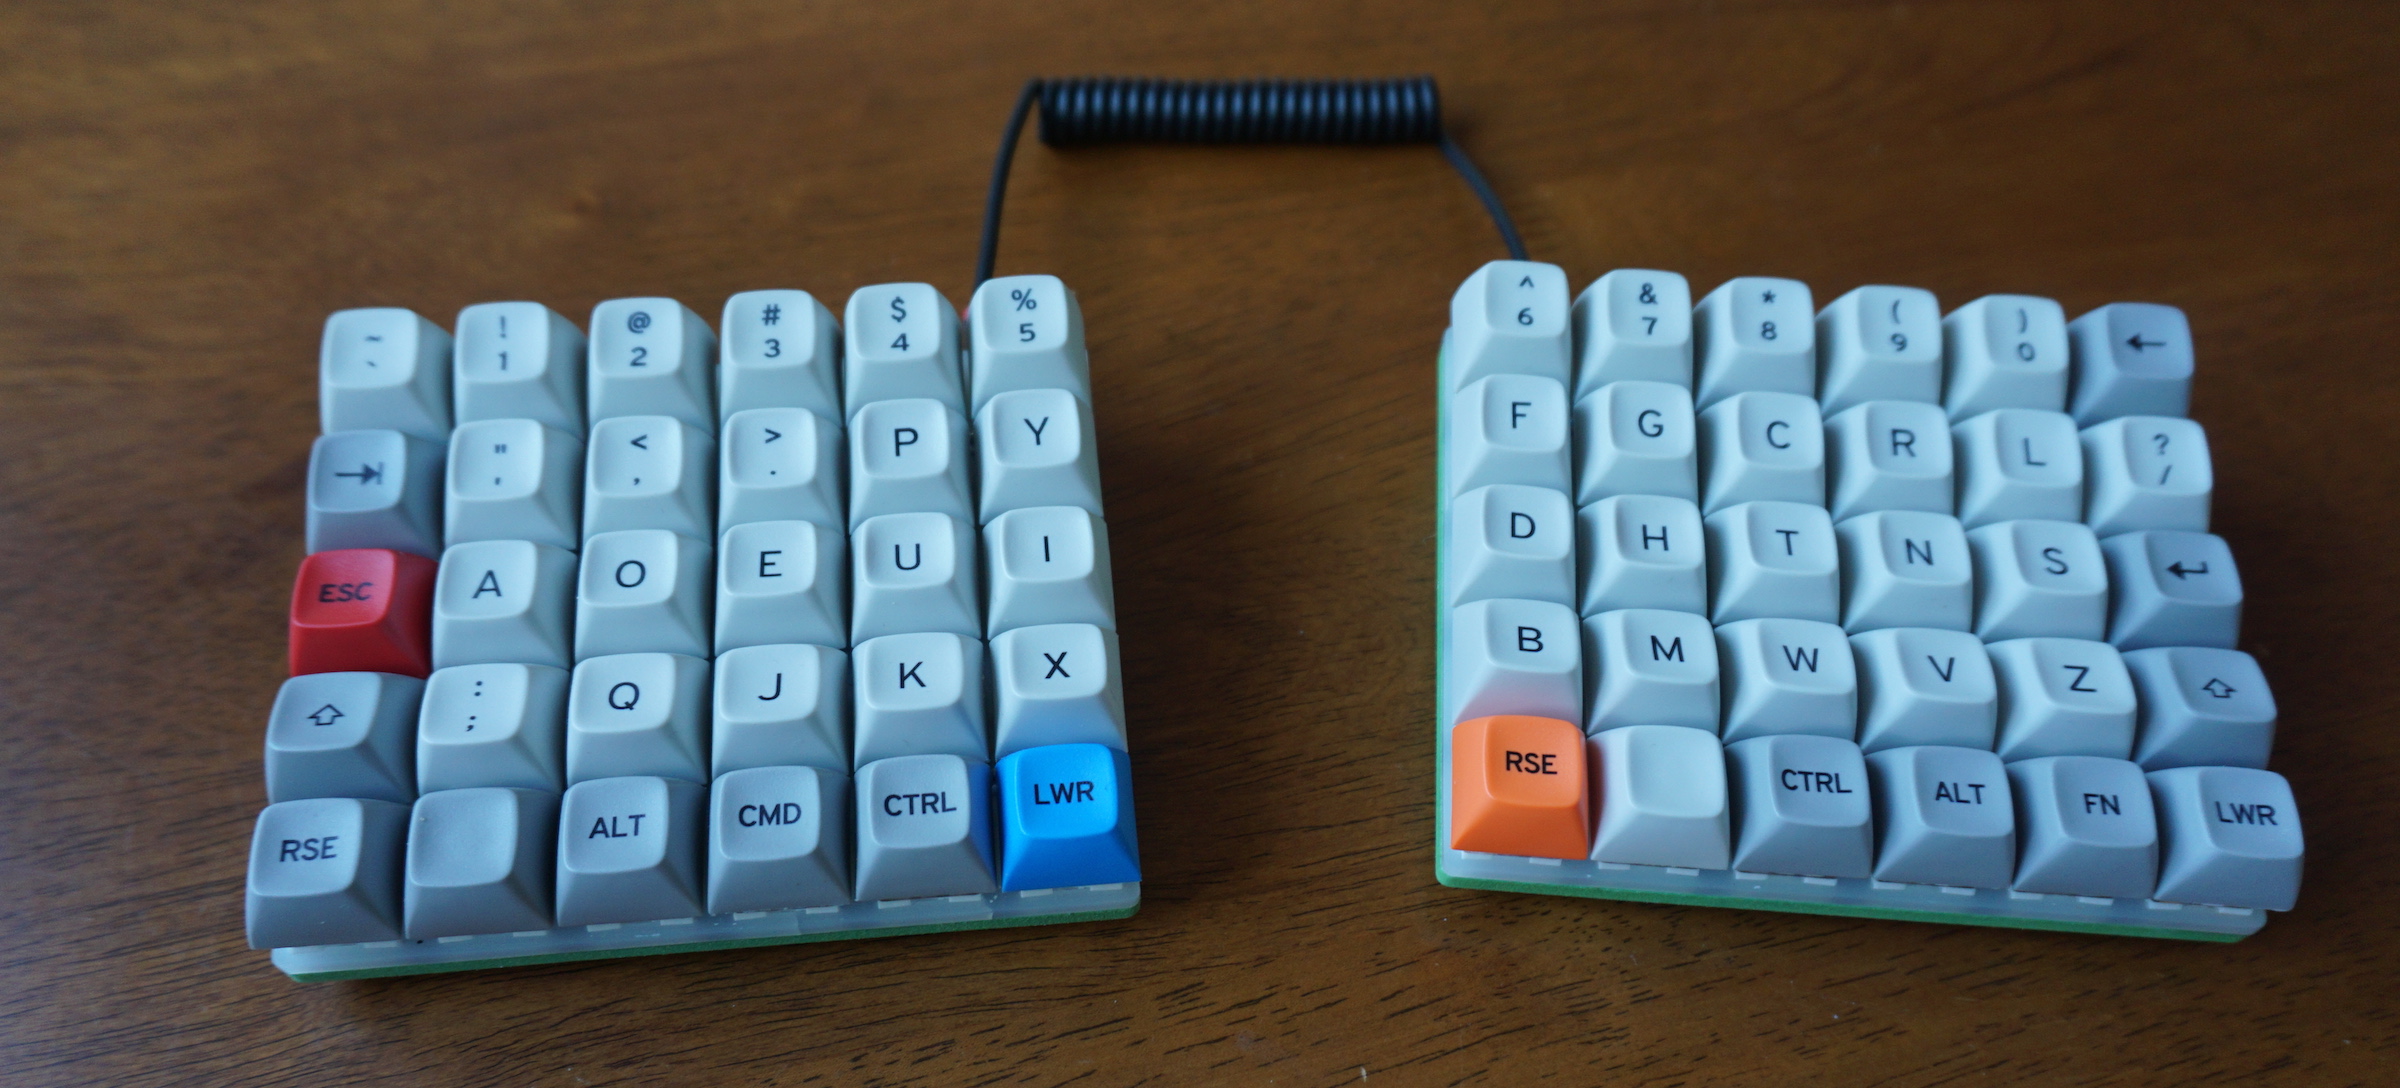
December 27 2018merp is a split ortholinear wireless mechanical keyboard I built in 2018. It has 60 keys arranged in a 12x5 grid and can communicate over either Bluetooth LE or USB.
Source files for the PCB, Case and acrylic plate, and
QMK fork can be all found on my Github.
Design
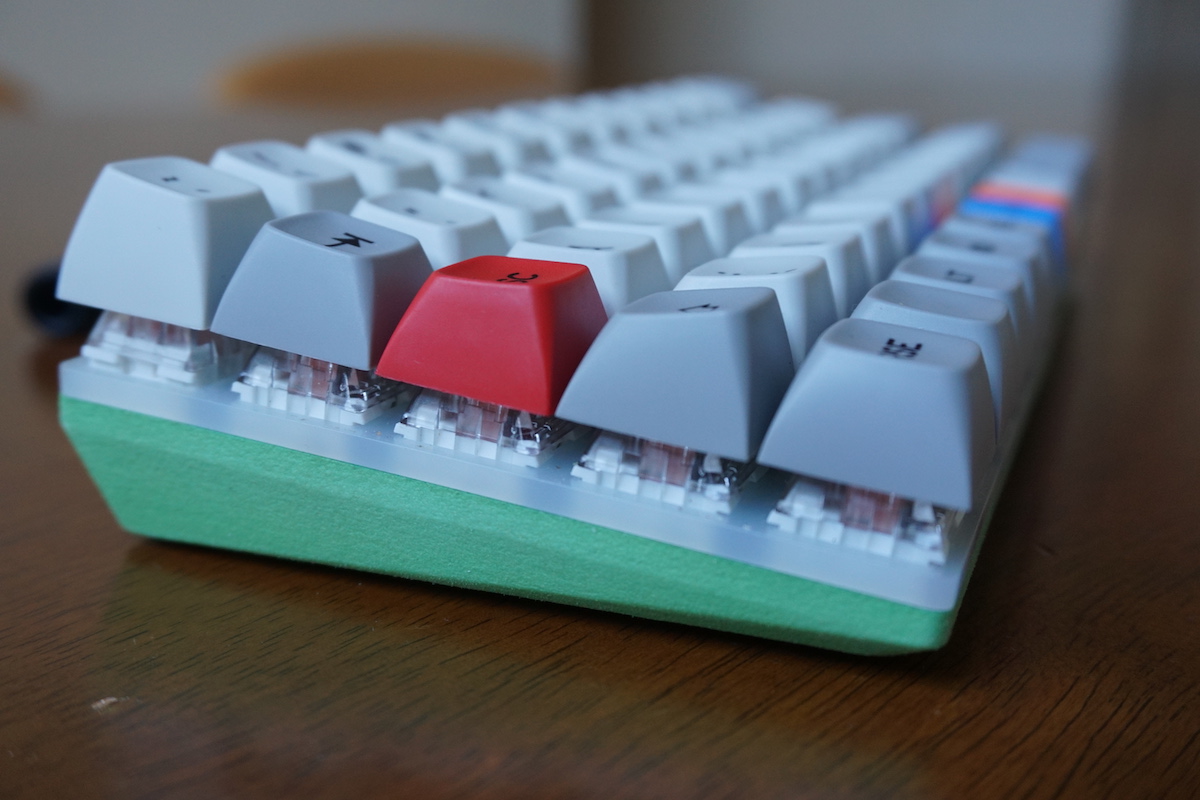
All switches are mounted on a laser-cut 3mm acrylic plate and then soldered onto the the PCBs. This assembly is then screwed onto a 3D printed case. The case is 3D printed by shapeways in “Green Processed Versatile Plastic”. I cut the plate on my university laser cutter and used spare 3mm milk-white acrylic someone had left behind. Cherry MX switches are designed to snap-fit onto 1.5mm metal, but I feared an acrylic plate this thin would crack easily.


The keyboard sits at a 7º angle. The two halves are connected using a TTRS cable. The left half has a power switch and USB-C port for charging and flashing firmware. (It is also possible to use the keyboard as a normal wired keyboard). This build uses Hako True switches and /dev/tty keycaps.

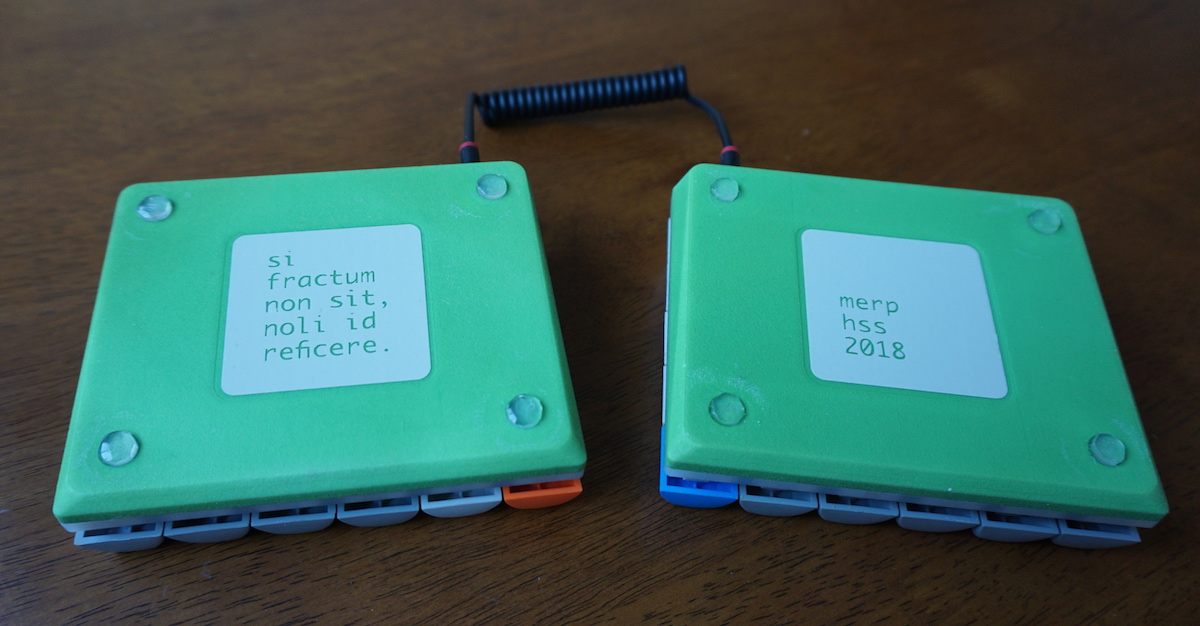
The back of the keyboard has silicone legs and two stickers, one of which reads “Si fractum non sit, noli id reficere” – Latin for “If it ain’t broke, don’t fix it”.
Backlight
I had leftover LED drivers from a previous project, so I decided to add LED backlight for entertainment purposes. Many switches have been rotated to accommodate for components on the PCB, so there was no way to have light uniform enough for backlit keycaps. However, since the acrylic plate and switches are somewhat transparent, this makes for some cool light effects:
Electronics
PCB

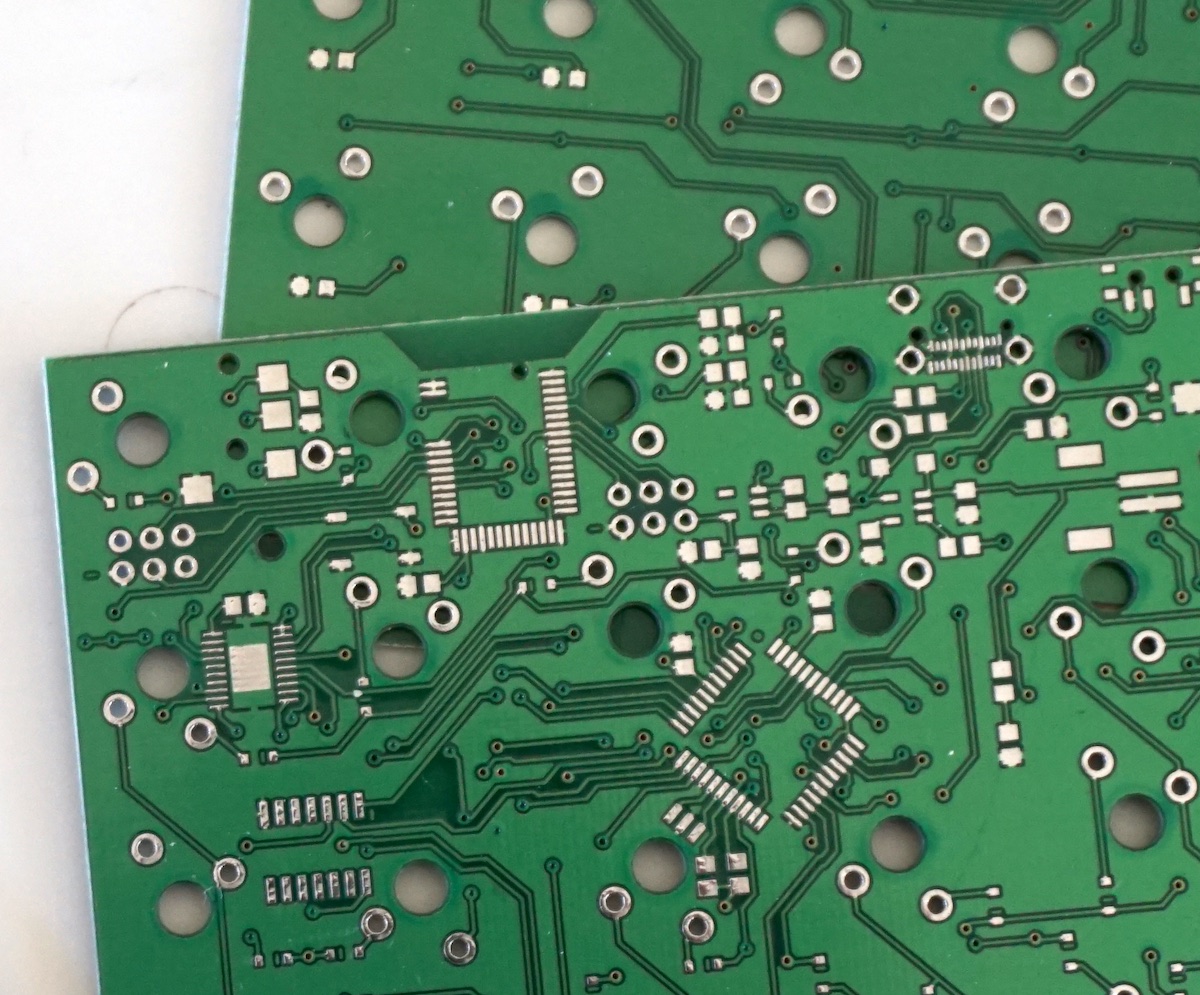
The PCB is based on Adafruit’s Feather development board and uses ATMega32u4 as its MCU. The keyswitches are wired in a matrix connected directly to the MCU pins. Underneath each switch there is a backlight LED addressable using TLC59711 drivers.
The two halves have identical PCBs and differ only by the components soldered. The slave half is missing the USB and battery charger circuitry.
Battery
The Adafruit Feather PCB has circuitry for charging a Li-ion battery via USB. I copied that and then reused the battery from a broken Nokia Microsoft phone. There is a power switch on the left half that turns the keyboard on and off. The battery charges whenever the keyboard is plugged in.
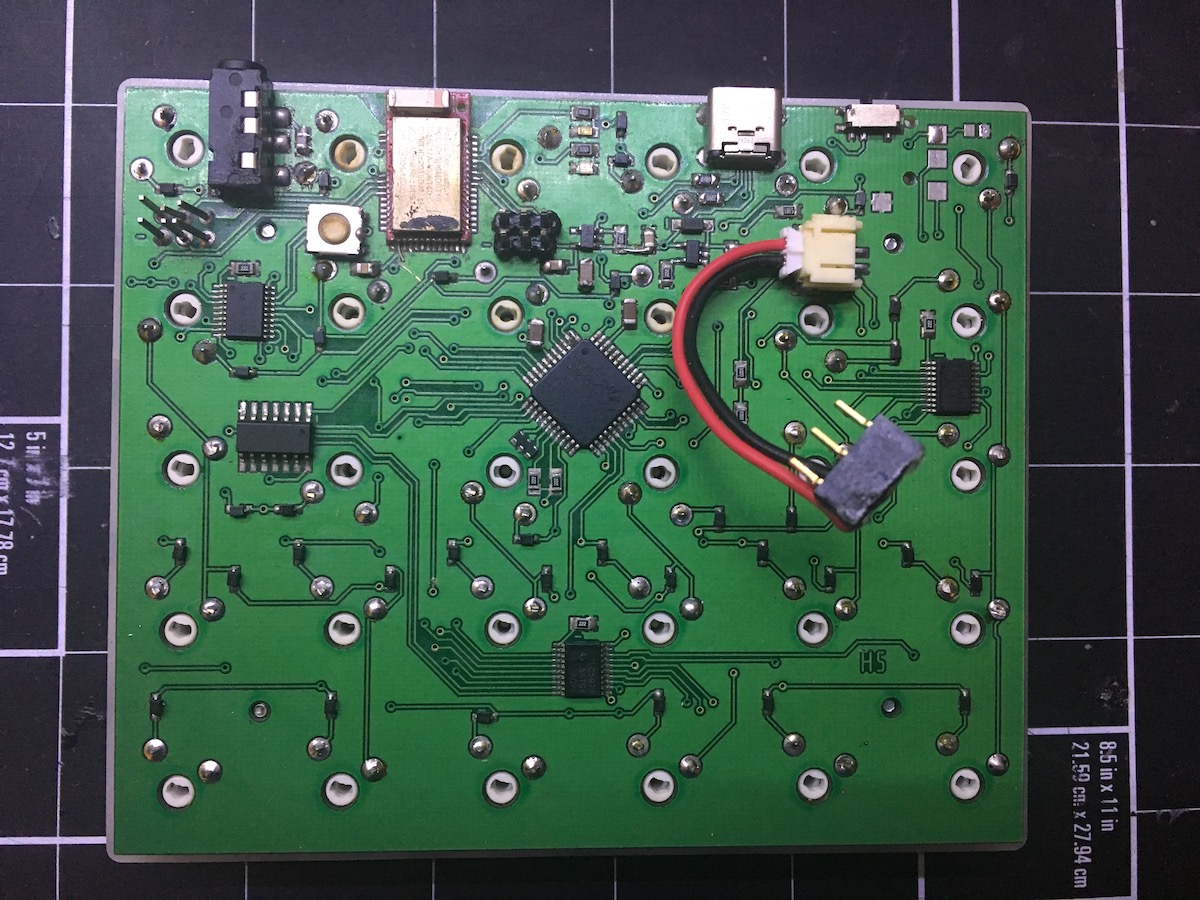

BLE Hardware
The keyboard uses the Raytac mdbt40-256rv3 module for bluetooth communication. This module is based on nRF51822 and is
the same module used in Adafruit’s Bluefruit LE SPI Friend, which QMK already supports.
The BLE module needs to be flashed with Adafruit’s BLESPIFRIEND firmware in order to work. Adafruit does not provide source code for their firmware due to licensing reasons, but binary files and instructions for flashing using STLink/V2 or J-Link are available online.
If you are building a keyboard based on this module, make sure you get the right one. There are versions with 16kB and 32kB of RAM whose part numbers differ by just one letter. Adafruit’s firmware needs 32kB, that is, the mdbt40-256rv3 module. I had accidentally bought the 16kB version, and instead of ordering a new one I ultimately desoldered a module from Adafruit’s BLE SPI Friend.
Assembly procedure
Small note on assembly: the BLE module and the ATMega use the SPI bus to communicate, which means it’s not possible to use ISP to flash firmware after the BLE module has been soldered on and programmed, as it will be using the SPI lines even if it’s being reset. Thus, the MCU should be programmed first, followed by the BLE module.
Software
The firmware is based on the open-source QMK project. I reused code from the Viterbi keyboard to get started with i2c communication between the two keyboard halves. The hristost_merp branch of my QMK fork contains configuration for this keyboard (./keyboards/merp), as well as a driver for TLC59711.
Keymap
I currently use a Dvorak layout.
Some keys have dual functions – for example, Esc acts as Escape when tapped, and as Control when used in combination with another key.
 ,-----------------------------------------.  ,-----------------------------------------.
 |   `  |   1  |   2  |   3  |   4  |   5  |  |   6  |   7  |   8  |   9  |   0  | Bksp |
 |------+------+------+------+------+------|  |------+------+------+------+------+------|
 | Tab  |   "  |   ,  |   .  |   P  |   Y  |  |   F  |   G  |   C  |   R  |   L  |  /   |
 |------+------+------+------+------+------|  |------+------+------+------+------+------|
 | Esc  |   A  |   O  |   E  |   U  |   I  |  |   D  |   H  |   T  |   N  |   S  | Enter|
 |------+------+------+------+------+------|  |------+------+------+------+------+------|
 | Shift|   ;  |   Q  |   J  |   K  |   X  |  |   B  |   M  |   W  |   V  |   Z  | Shift|
 |------+------+------+------+------+------|  |------+------+------+------+------+------|
 |      | Ctrl | Alt  | Cmd  | Esc  | Tab  |  | Enter| Space|      |      |      |Raise |
 `-----------------------------------------'  `-----------------------------------------'
                               Ctrl   Lower     Raise  Shift
Holding down Raise and Lower keys gives access to more keys. For example, H, T, N or S act as arrow keys if Raise is pressed.
Low layer
 ,-----------------------------------------.  ,-----------------------------------------.
 |      |      |      |      |      |      |  |      |      |      |      |      |      |
 |------+------+------+------+------+------|  |------+------+------+------+------+------|
 |      |   &  |   \  |   (  |   )  |      |  |      |      |      |      |      |      |
 |------+------+------+------+------+------|  |------+------+------+------+------+------|
 |      |   _  |   =  |   [  |   ]  |      |  |      |      |      |      |      |      |
 |------+------+------+------+------+------|  |------+------+------+------+------+------|
 |      |   -  |   +  |   {  |   }  |      |  |      |      |      |      |      |      |
 |------+------+------+------+------+------|  |------+------+------+------+------+------|
 |RESET |      |      |      |      | Lower|  |      |      |      |      |      |      |
 `-----------------------------------------'  `-----------------------------------------'
High layer
 ,-----------------------------------------.  ,-----------------------------------------.
 |      |      |      |      |      |      |  |      |      |      |      |      |      |
 |------+------+------+------+------+------|  |------+------+------+------+------+------|
 |      |      |      |      |      |      |  |      |      |      |      |      |      |
 |------+------+------+------+------+------|  |------+------+------+------+------+------|
 |      |      |      |      |      |      |  |      | Left | Down |  Up  | Right|      |
 |------+------+------+------+------+------|  |------+------+------+------+------+------|
 |      |      |      |      |      |      |  |      |  \   |      |      |      |      |
 |------+------+------+------+------+------|  |------+------+------+------+------+------|
 |      |      |      |      |      |      |  | Raise|      |      |      |      |Raise |
 `-----------------------------------------'  `-----------------------------------------'
Bluetooth
QMK already supports the Bluefruit LE SPI Friend module out of the box. Adding Bluetooth support was ultimately a matter of editing the rules.mk file to include
BLUETOOTH = AdafruitBLE
and then assigning the correct pins:
#define AdafruitBleResetPin B5
#define AdafruitBleIRQPin   B6
Backlight
I had to write code to communicate with the TLC59711 LED drivers. Communication is rather simple, as it only needs a Clock and Data line. I tied the clock of the driver to SCK, and the data line to MOSI. However, the TLC59711 lacks a Slave Select (SS) pin. To accommodate for that, I added an AND gate that adds SCK and SS, and outputs to the data input for the driver. This way, the driver receives data all the time, but processes it only when SS is high.

The LED driver is implemented in drivers/avr/tlc59711.{h, c}. I modified split_util.c from Viterbi’s firmware to continuously call functions that update the LED state. Currently, the backlight is hardcoded to be rather simple: pressing any key sets its LED to on, releasing any key creates a ripple effect. If I have time, I might refactor my code and make a pull request to merge TLC59711 support into QMK.